Quick Start
LabScale is a scheduling and testing service designed to be simple and flexible in an effort to remove the burden of developing a costly, custom automation solution for testing embedded devices. It is composed of a centralized web application where tests, or jobs, are scheduled, a middleware that handles communication, and a remote that executes these tests. This document will guide you through signing up with LabScale, installing an agent, and executing a test.
Many of the example tests are written in Python and for these to work correctly it is best to have Python v3.8 (or better) and the latest version of pip installed.
If you installed Xcode on an M1 Mac, a recent update to Xcode may cause Python
scripts to exit with the error invalid active developer path, missing
xcrun. To fix this, execute xcode-select --install in a terminal window.
Create a Team
The web application is where the customer schedules jobs against devices for testing. The tests are farmed out to agents which execute them and report results back to the web application. These results can then be aggregated into reports covering the entire project. These resources are grouped into Teams which allow for collaboration with others.
In order to use LabScale, you will first need to create a Team account, you can do this by following these instructions:
-
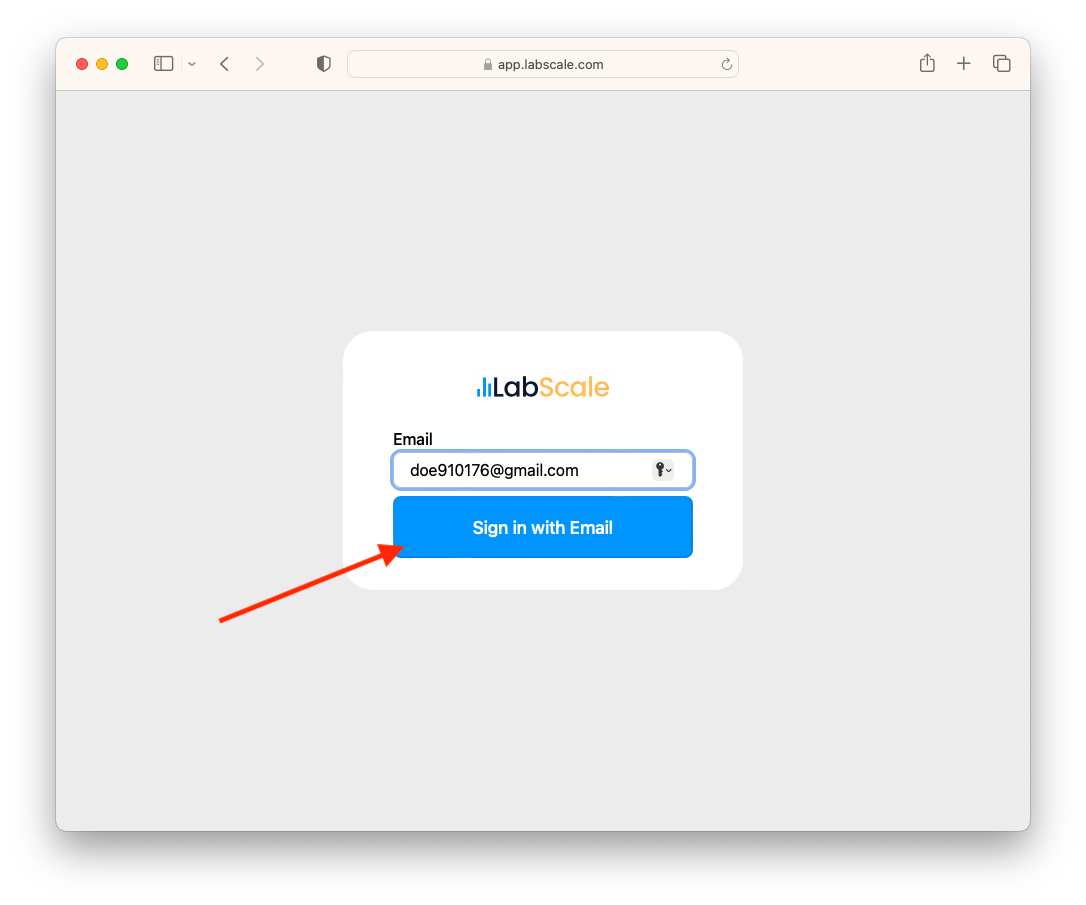
Visit LabScale.com application page.
-
When prompted, provide your email address and click on the "Sign in with Email" button.
-
Once finished, you will have to wait for an email to be sent to your email address.
-
After a few minutes, an email should arrive in your inbox. Within the email, click on the button labeled "Sign in" and you will be redirected back to the LabScale app.

-
Enter a "Team Name". The Team Name can be shared with other individuals for collaboration.
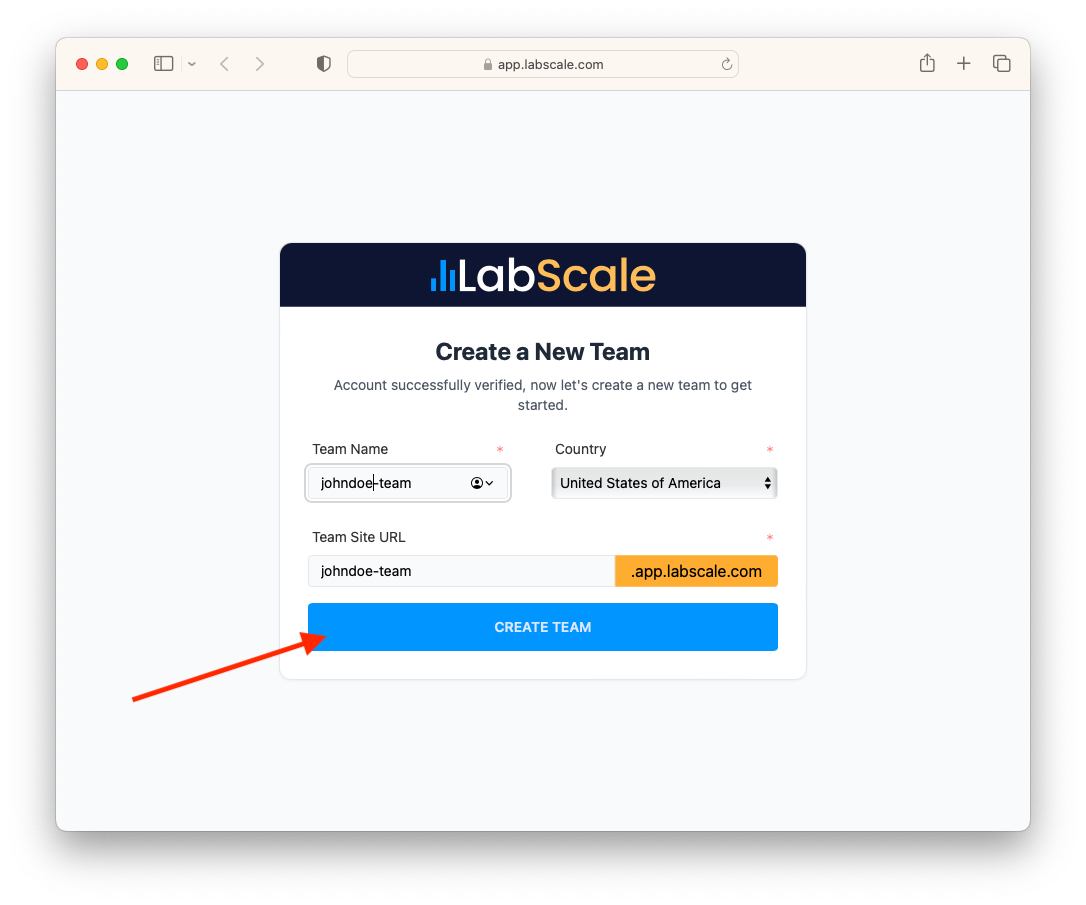
-
After a few seconds you will be taken to the LabScale application home page.
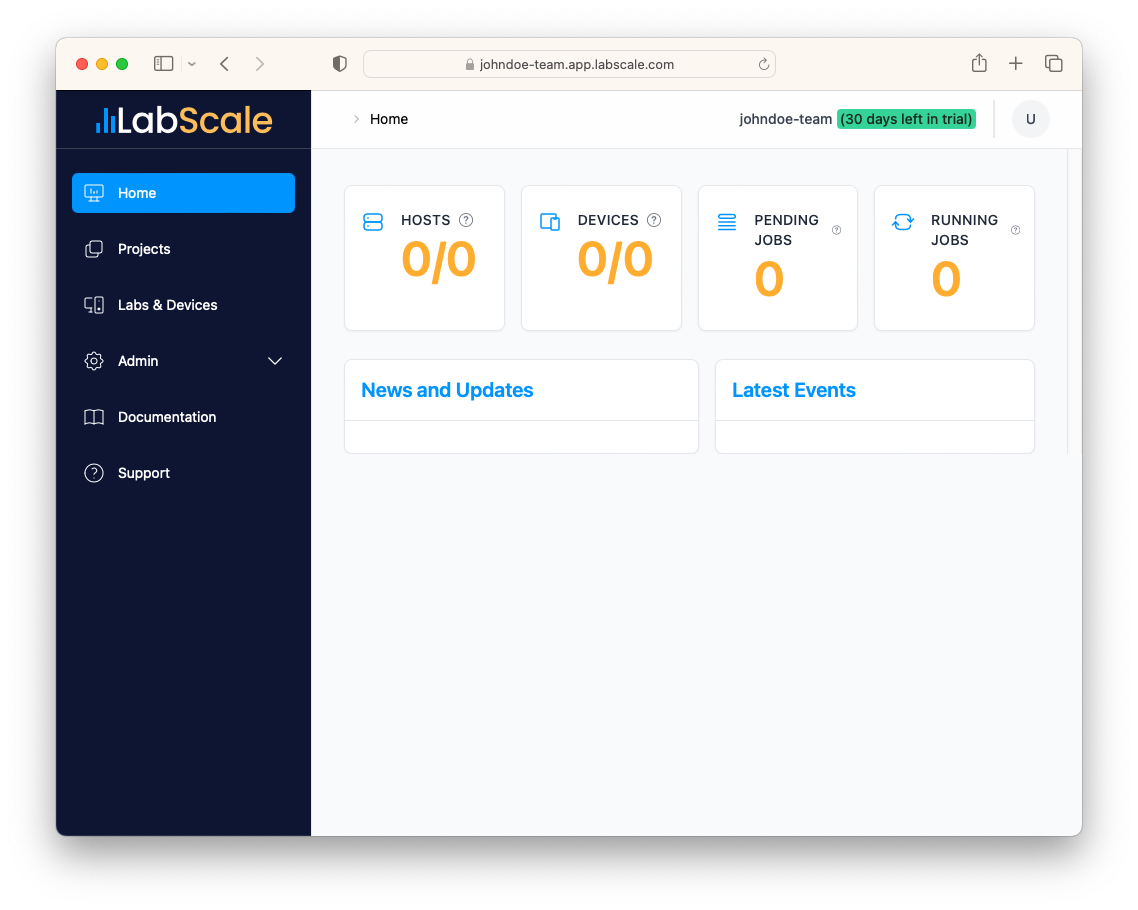
Now that you have a team, you can setup a host and install the agent!
Add a Lab
Agents and devices are grouped into Labs, which are an organizational tool but also a way to collect together devices that may require shared resources, such as Wifi access points or specific test fixtures required by tests that are physically located in proximity of the hardware under test.
-
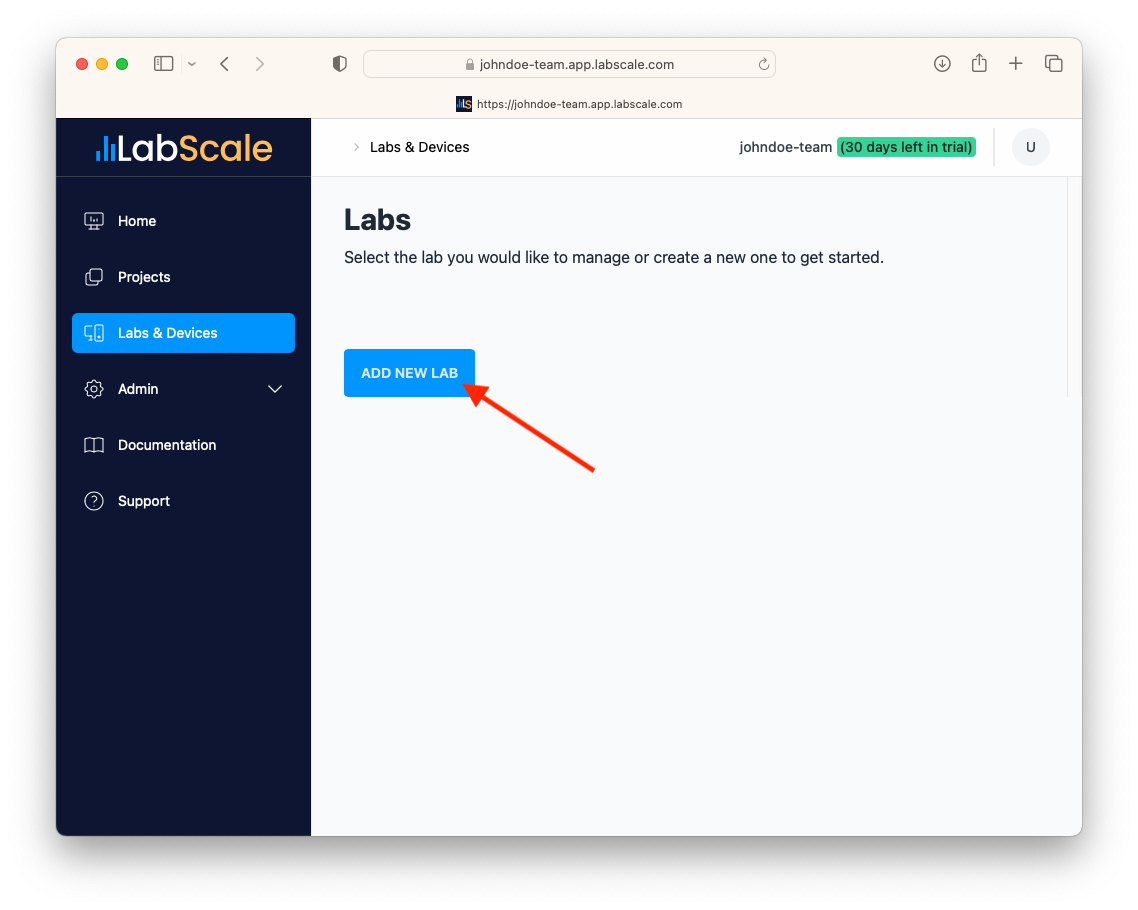
You will first need to setup a Lab. In the web application, click on the Labs & Devices menu item in the side bar.
-
Then click on the button labeled ADD NEW LAB.
-
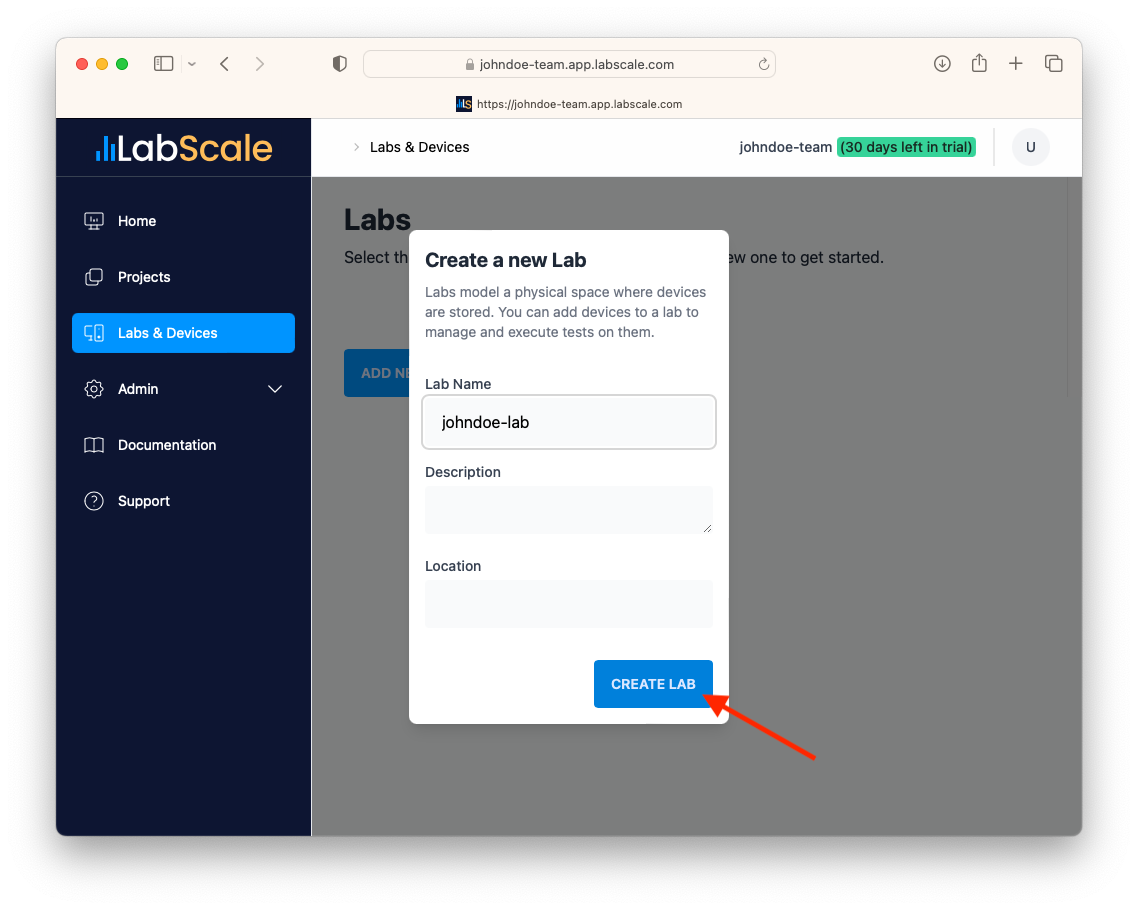
Enter the name of your lab and click CREATE LAB.
-
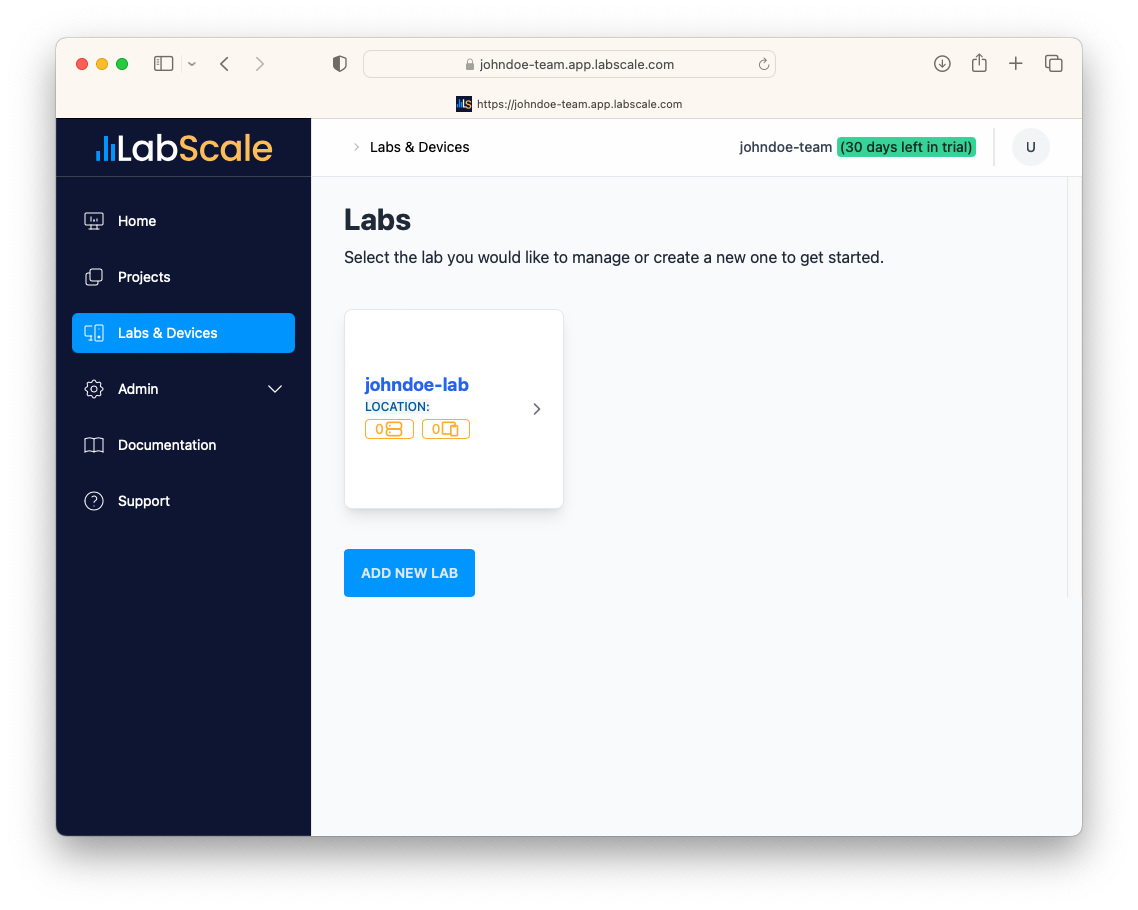
Once you have created a lab, you will see it appear in the Labs page.
Install the Agent
The agent is a software package that is intended to run on your desktop or local workstation. The agent tracks the state of devices under test, executes jobs and tests, and is responsible for reporting results back to the LabScale service. Agents are grouped into Labs for ease of management. To set up an agent on your local host, do the following:
-
Click on your new lab in the Labs page to manage the lab.
-
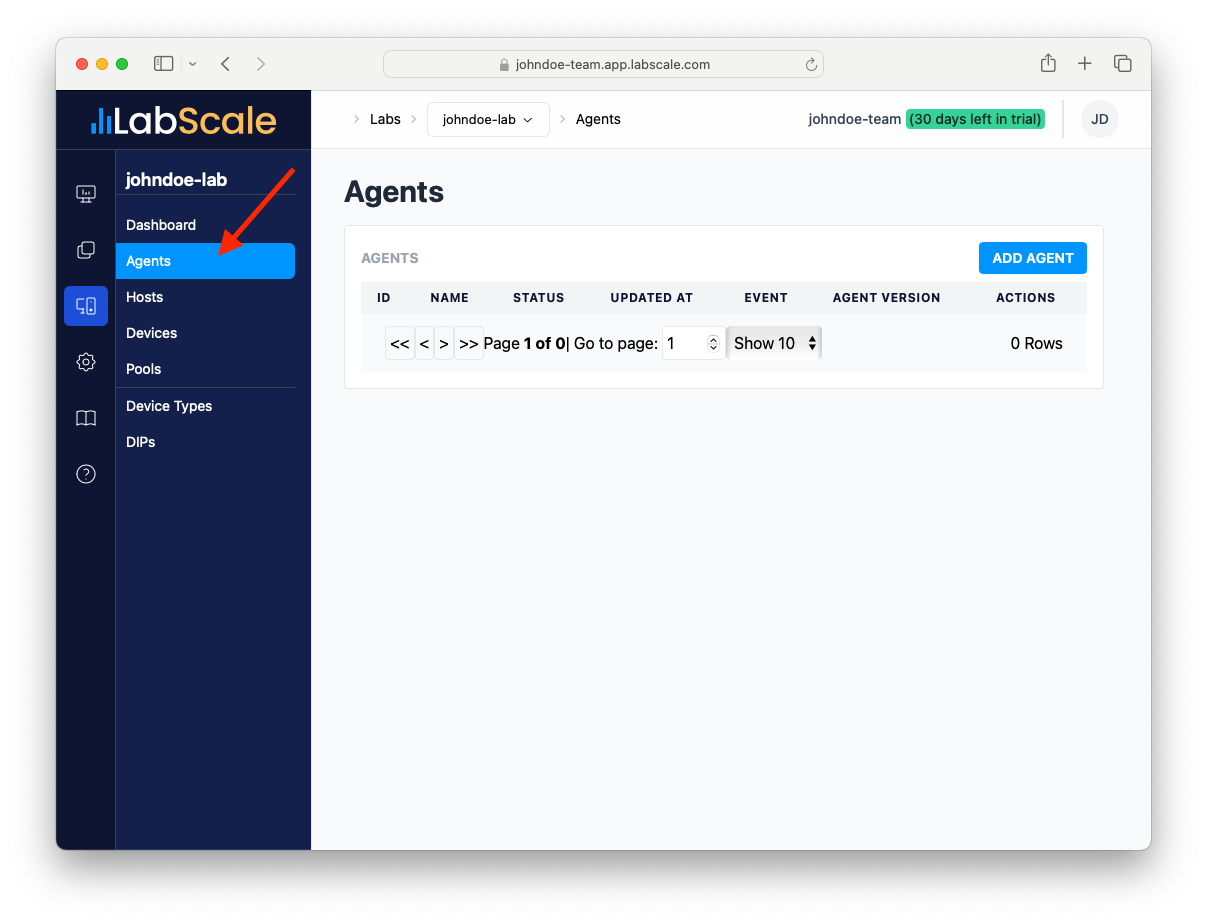
Once in the lab screen, click on the Agents menu in the side bar.
-
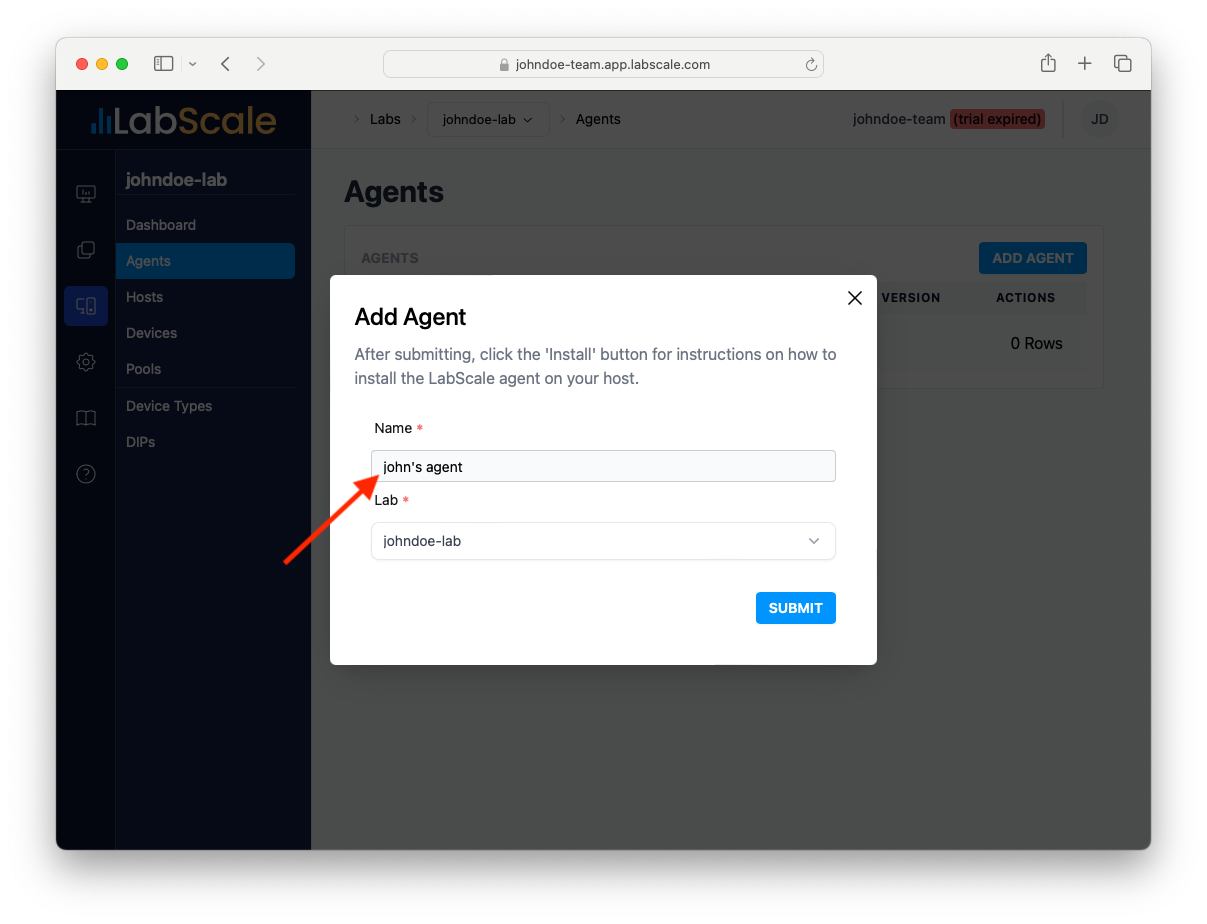
Click on the ADD HOST button.
-
Enter the name of your host name.
-
Click on the SUBMIT button.
-
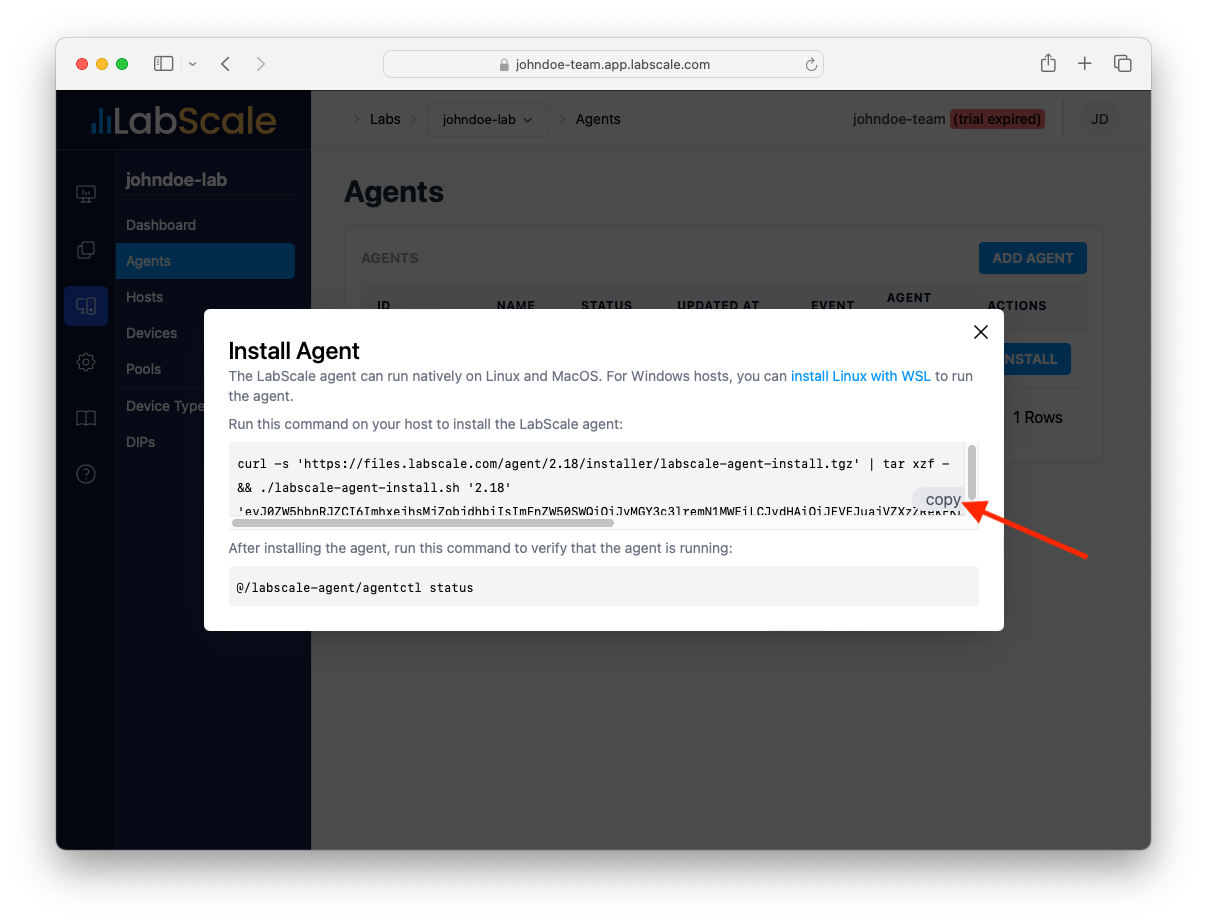
Once back at the Agents page, click on the INSTALL button to the left of your newly created agent.

-
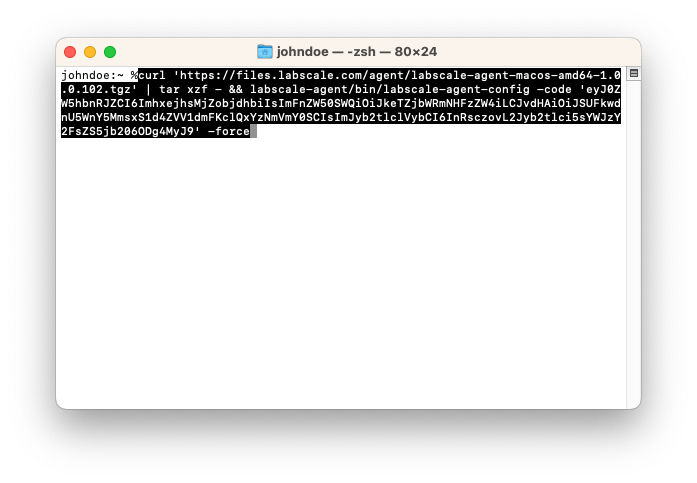
In the dialog, click on the copy button in the dialog box. Then open a terminal window on your desktop (or whatever host you intend to run the agent on) and paste into a terminal window. Press Enter.
-
Once the agent has been installed, start it by typing
./labscale-agent/agentctl start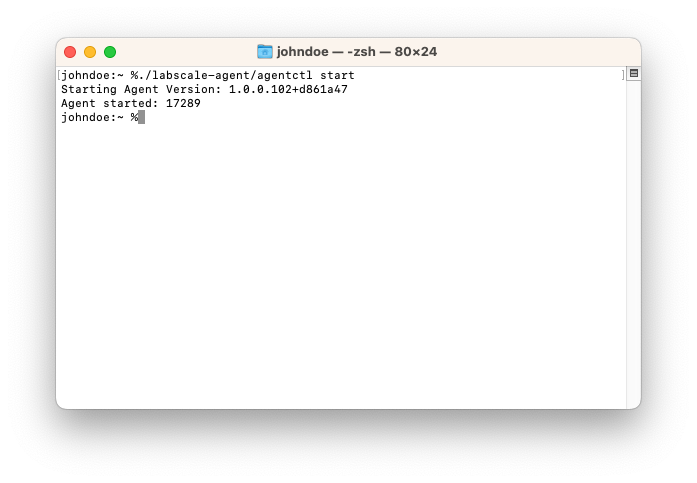
-
After a few seconds, the agent you just installed will show an online status.

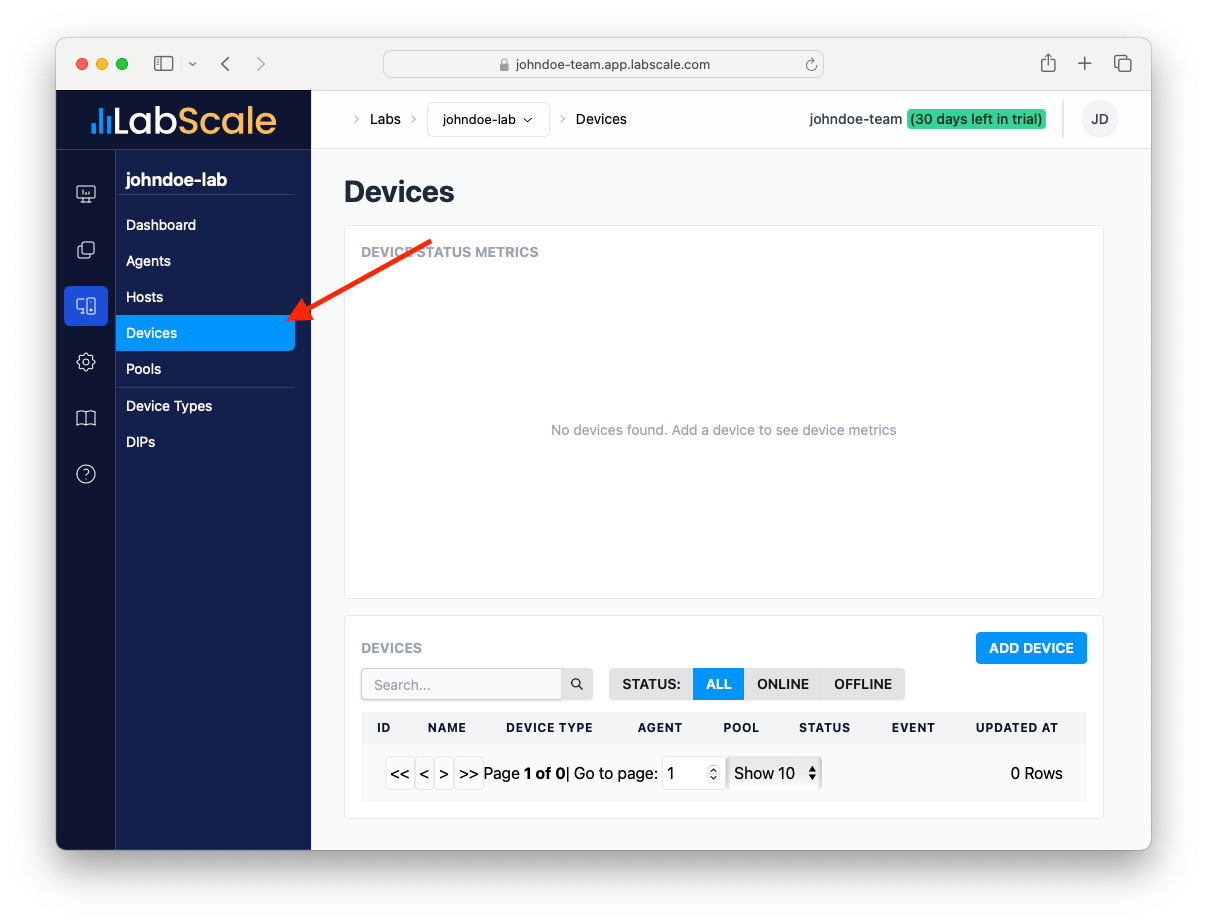
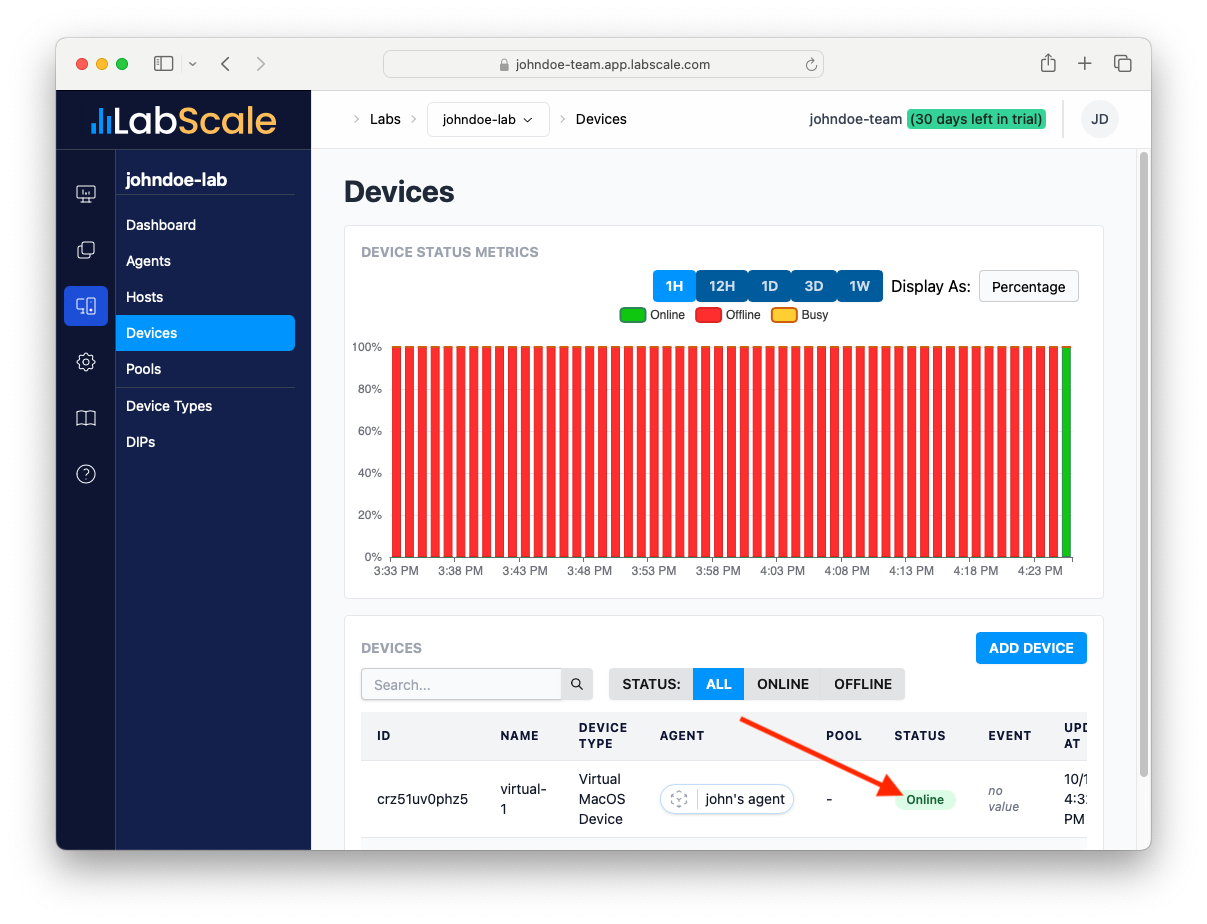
Add a Device
The agent manages associated devices used for testing and executes tests against them. You will need to create a device and associate it with an Agent.
-
If you just finished installing the agent, click on the Devices menu in the menubar on the left, this will take you to the Devices Page.
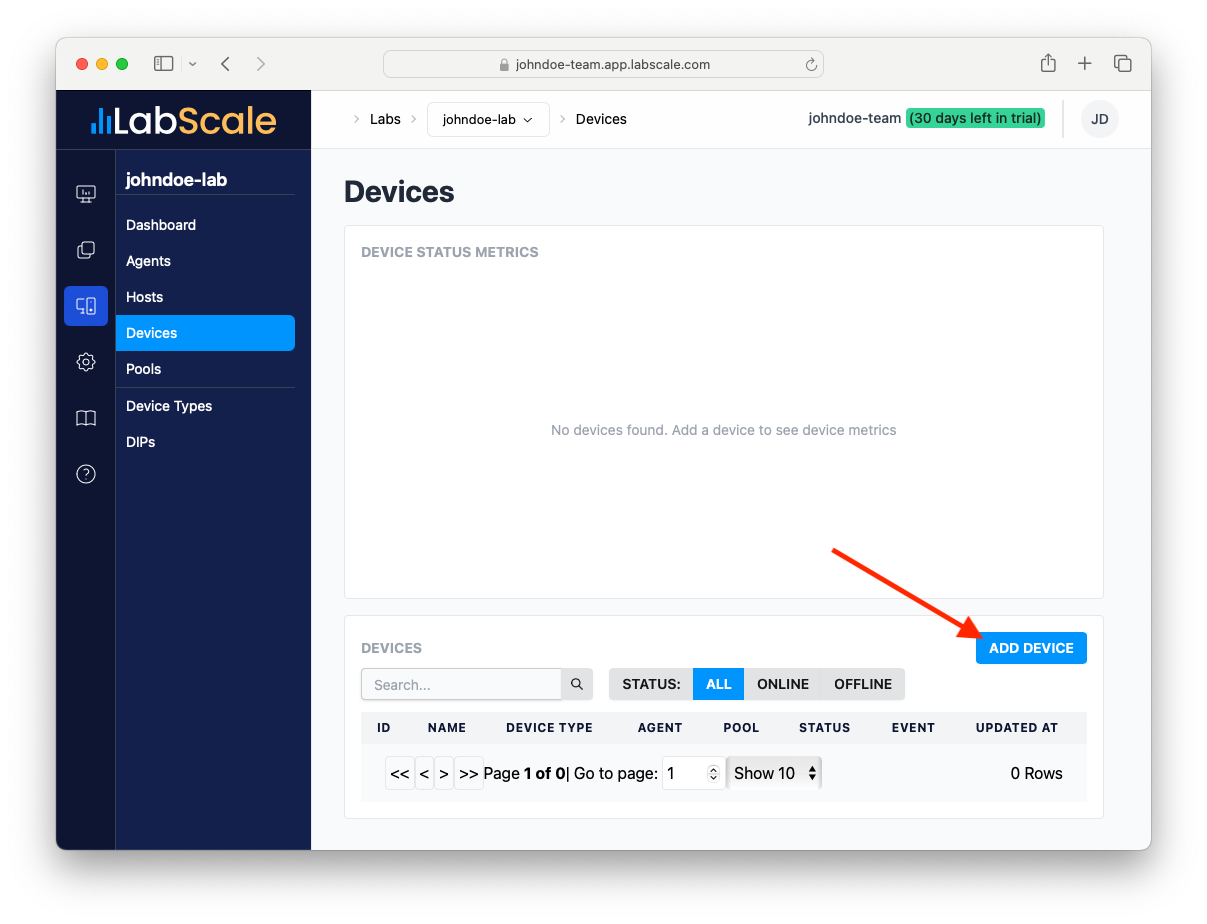
-
Then click on the ADD DEVICE button in the agent setup dialog.
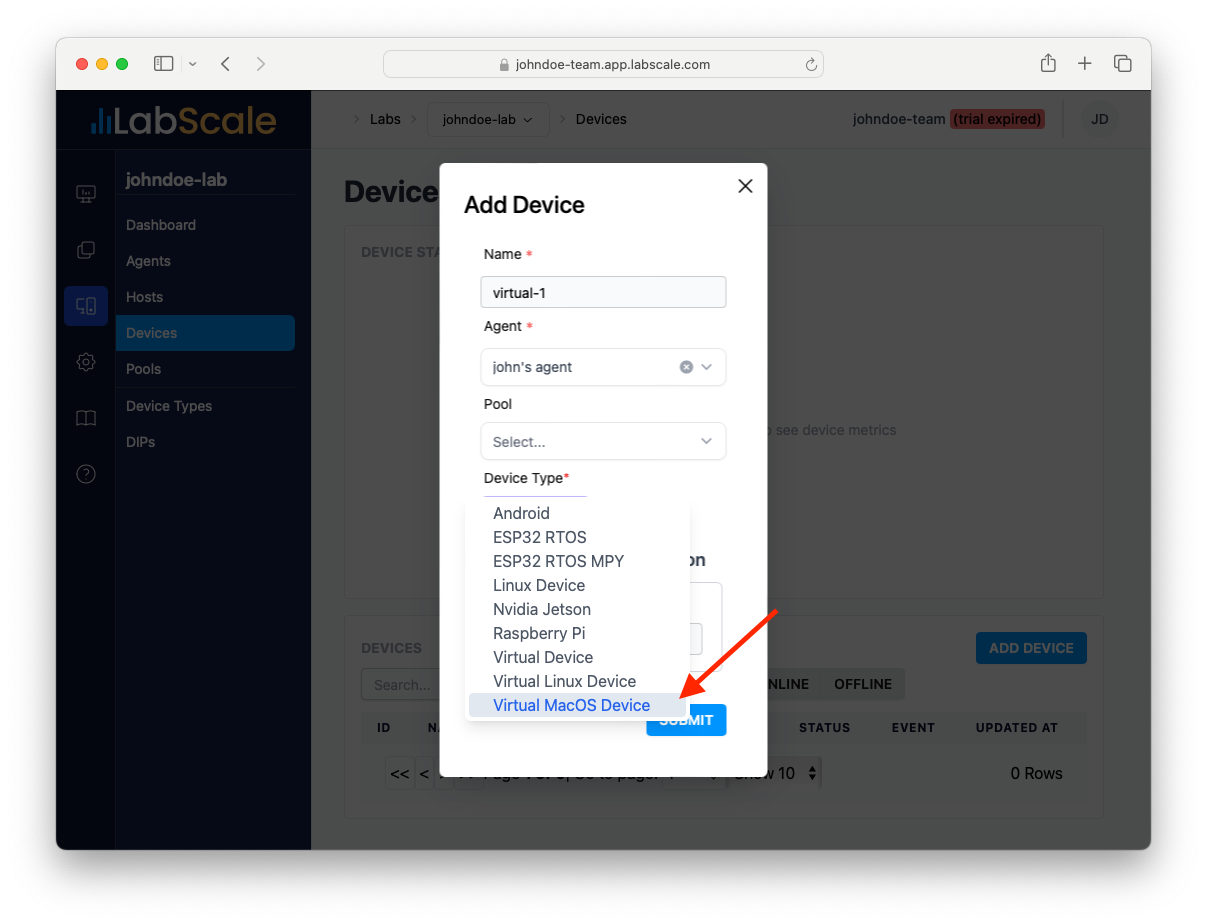
-
Enter the desired name of your new Device and assign it to your Host (created in the previous section above).
-
For purposes of this demo, select Virtual Device as the Device Type.
-
Click the SUBMIT button.
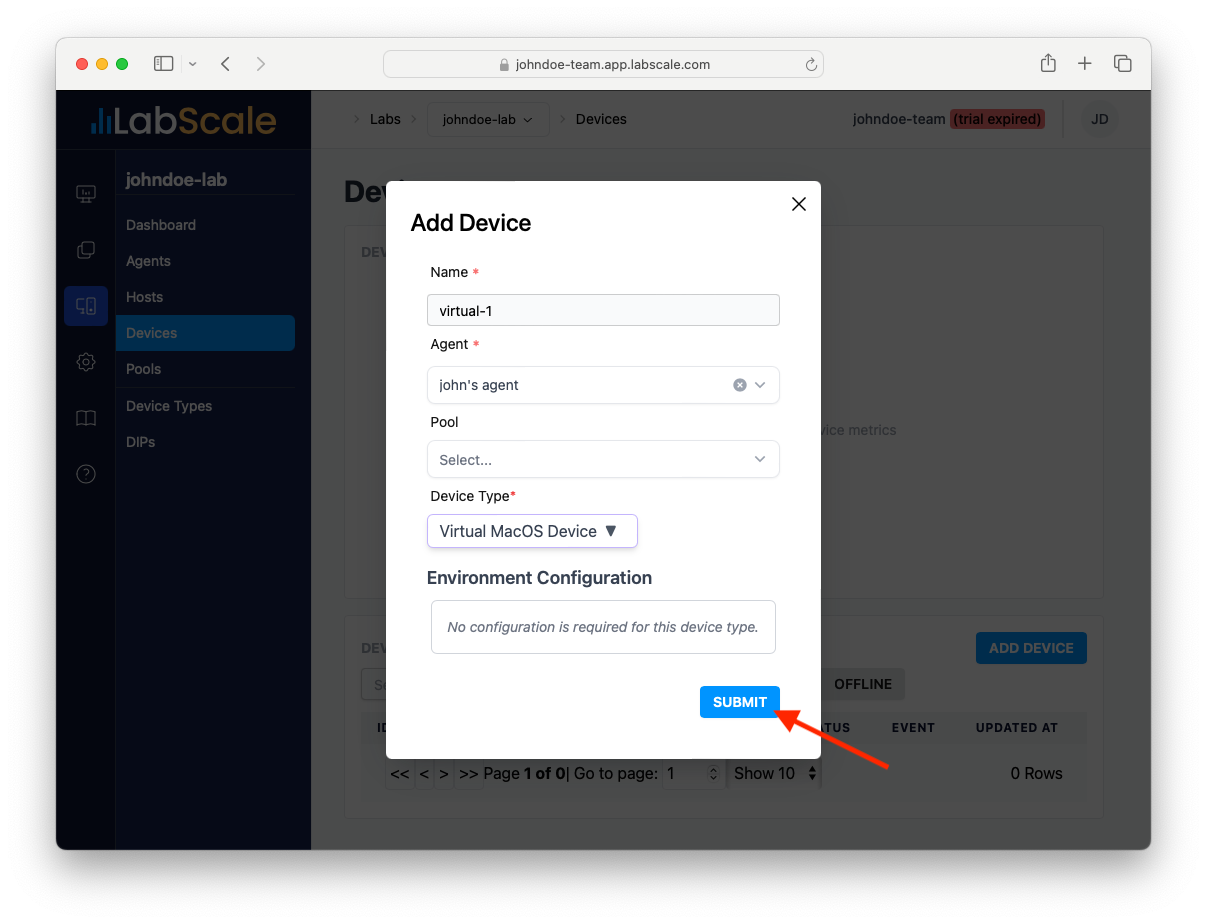
-
If your agent is online, your new device should appear as online within a few moments.
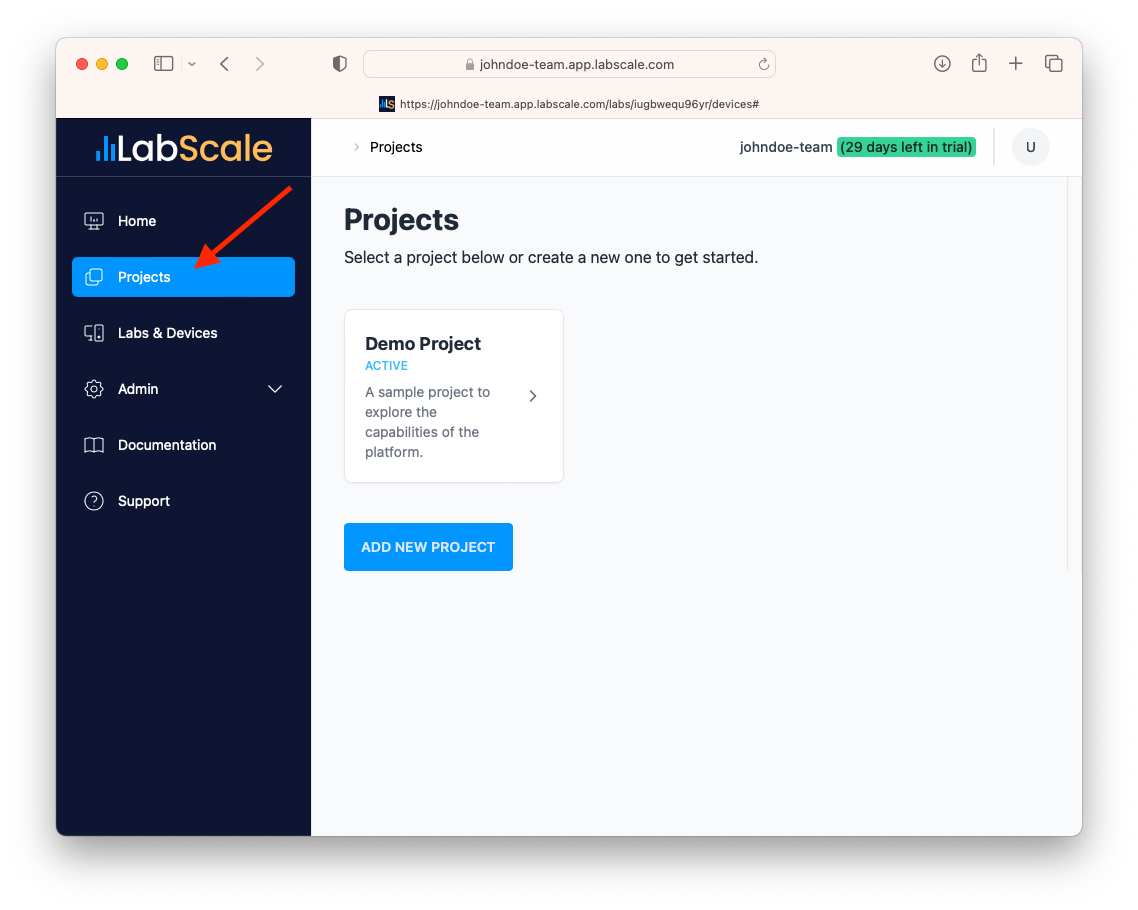
Run a Test
Once you have created a host and device, you can now schedule tests to the device. To do this, follow these instructions:
-
Select the Projects menu option in the navbar on the left side of the screen.
-
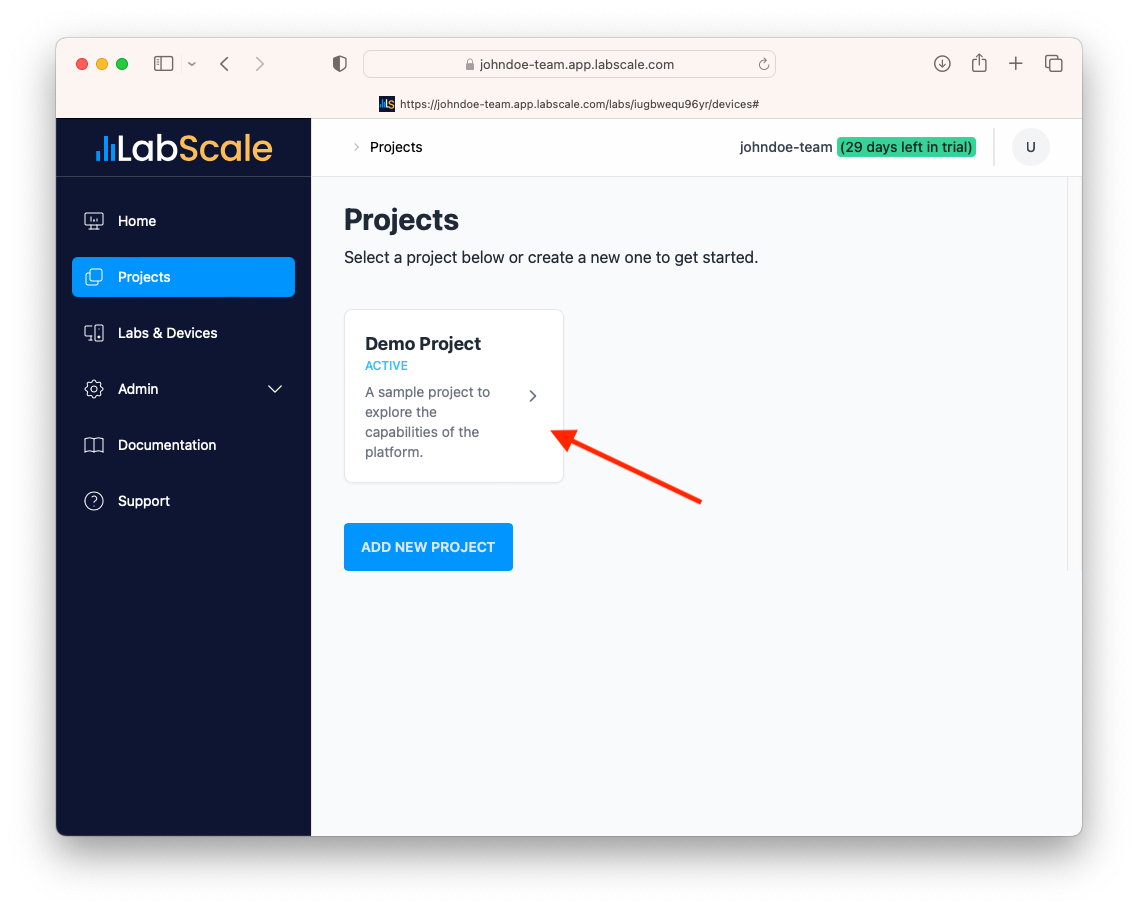
Select the Demo project.
-
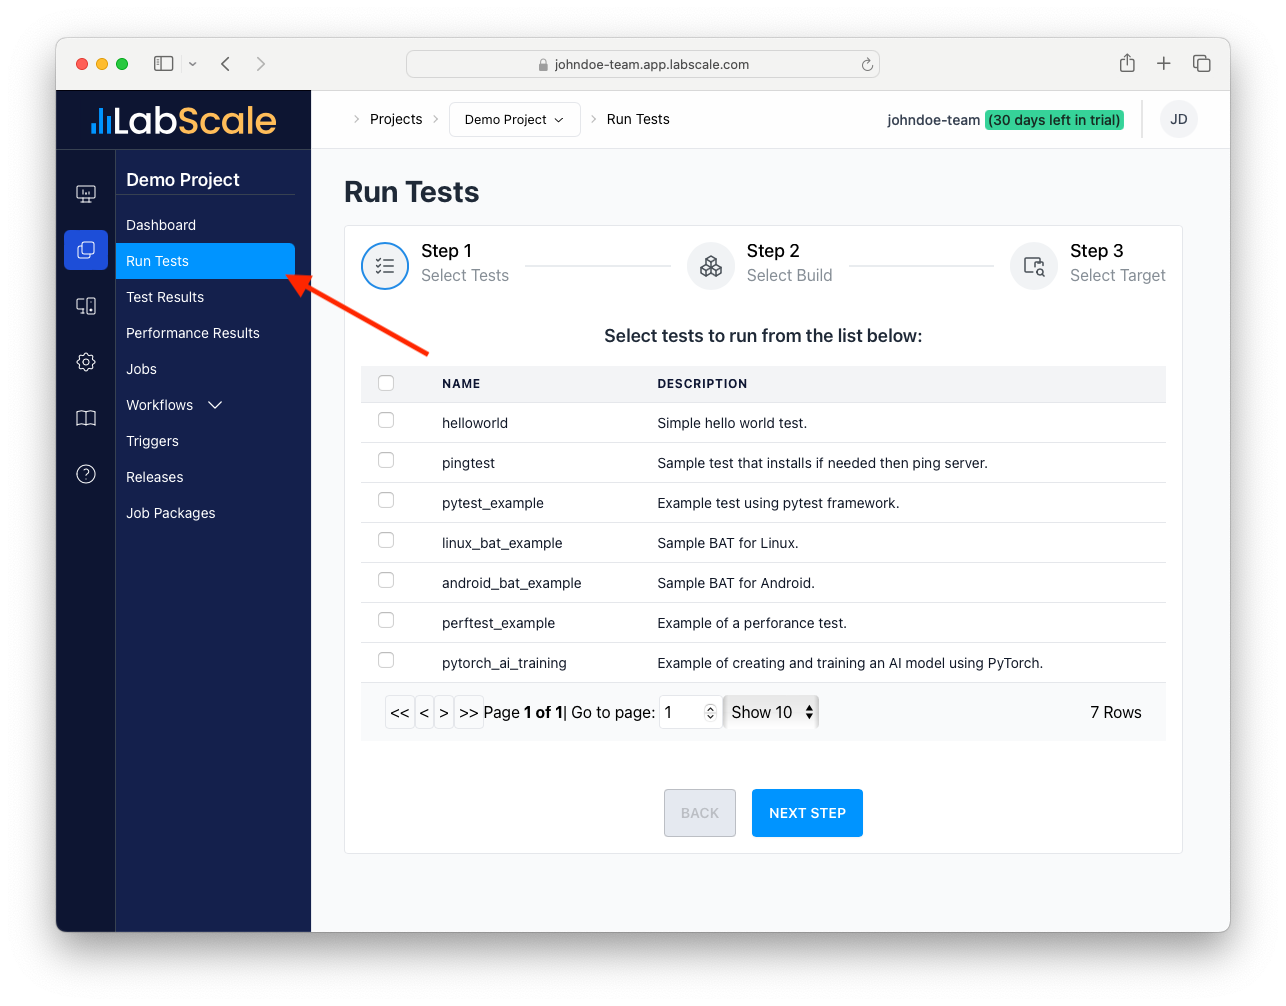
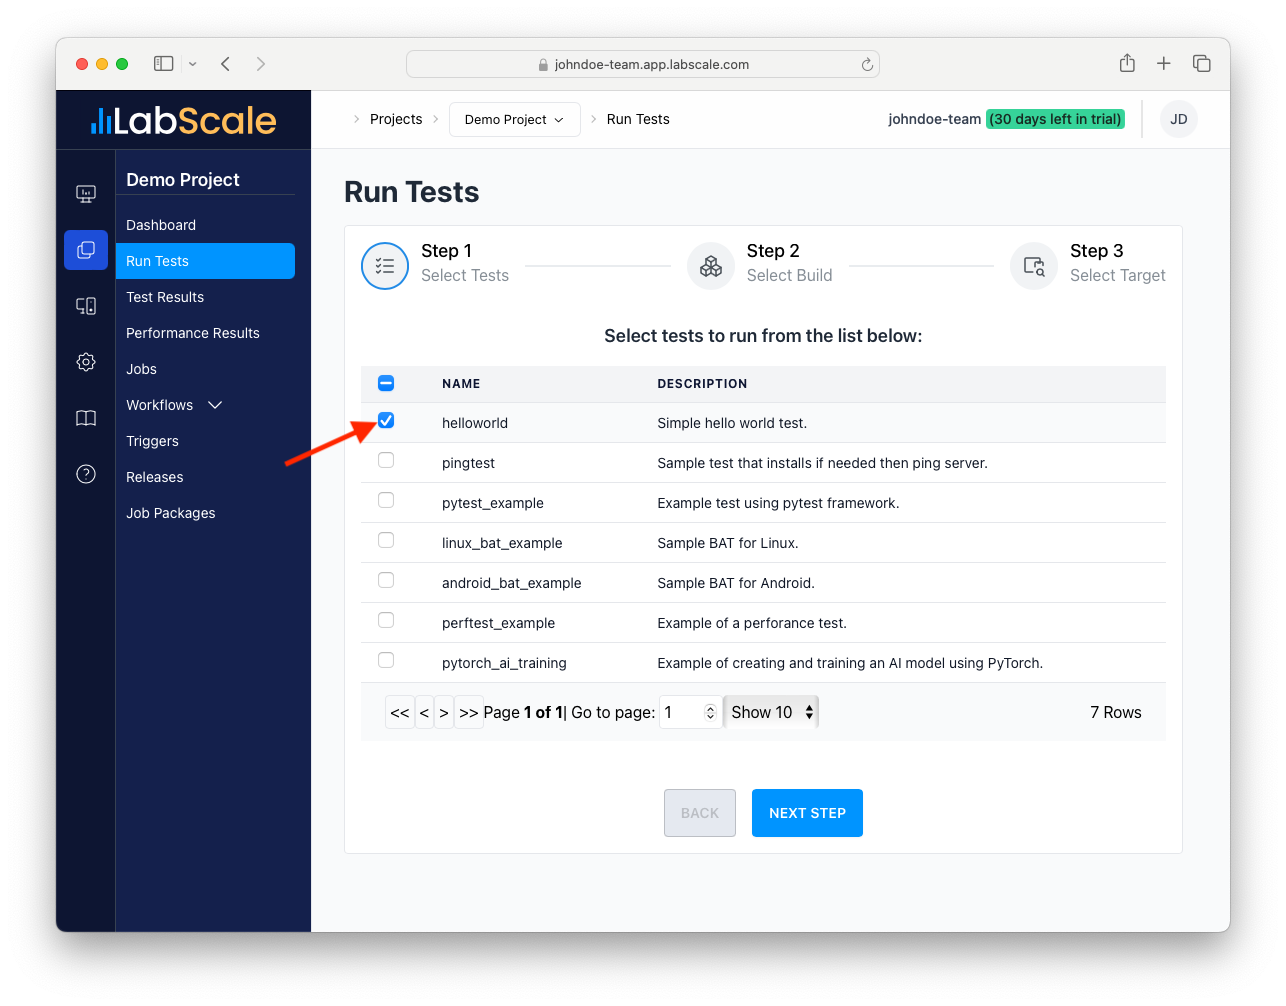
In the navbar on the left, select Run Tests.
-
Click on checkbox on the left of the the helloworld test suite.
-
Click on the NEXT STEP button.
-
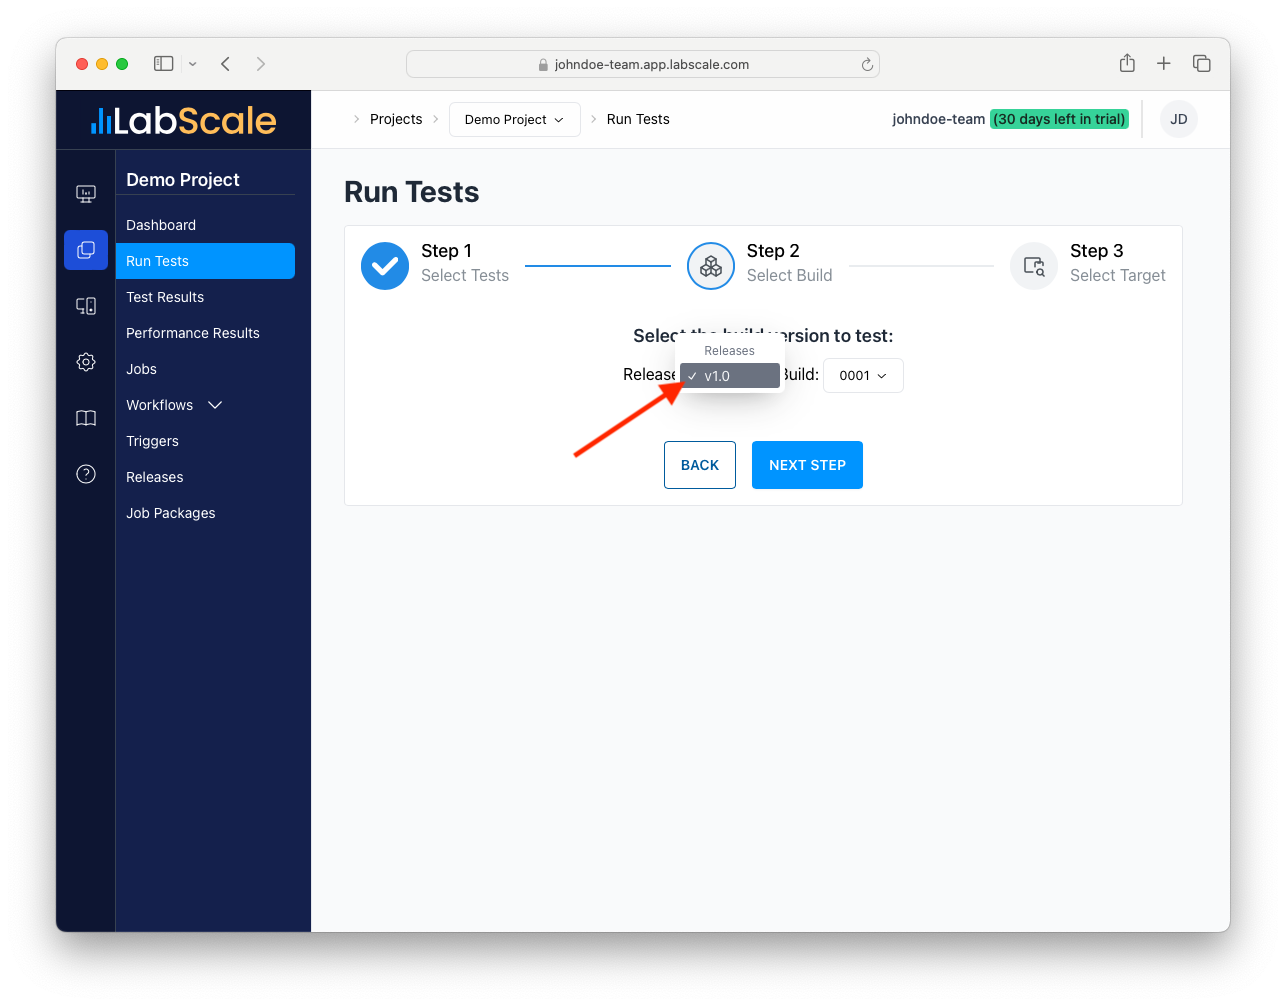
Click on Select a release and select v1.0.
-
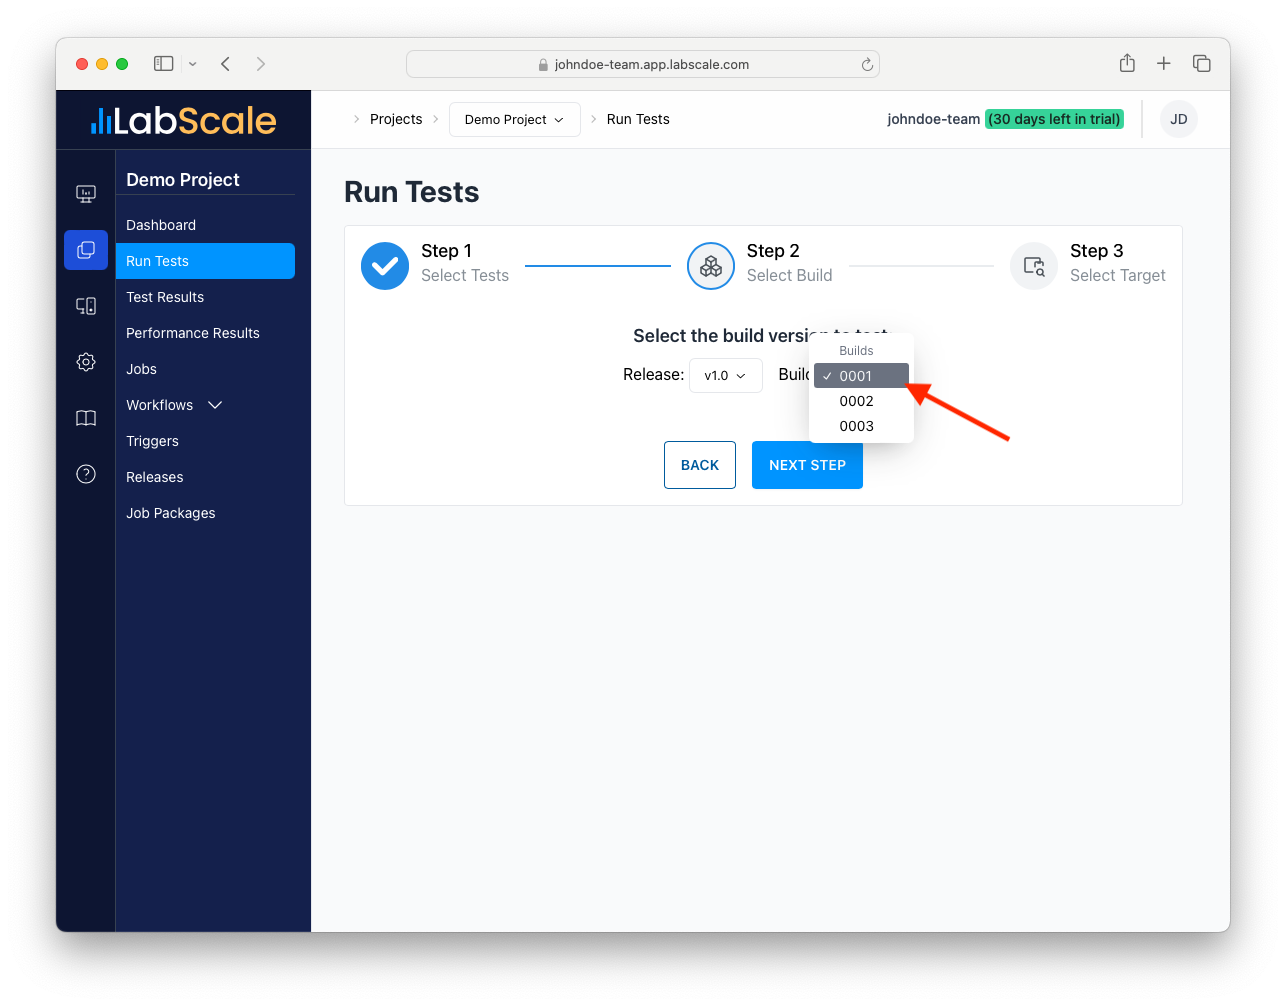
Click on Select a build and select 0001.
-
Click on NEXT STEP.
-
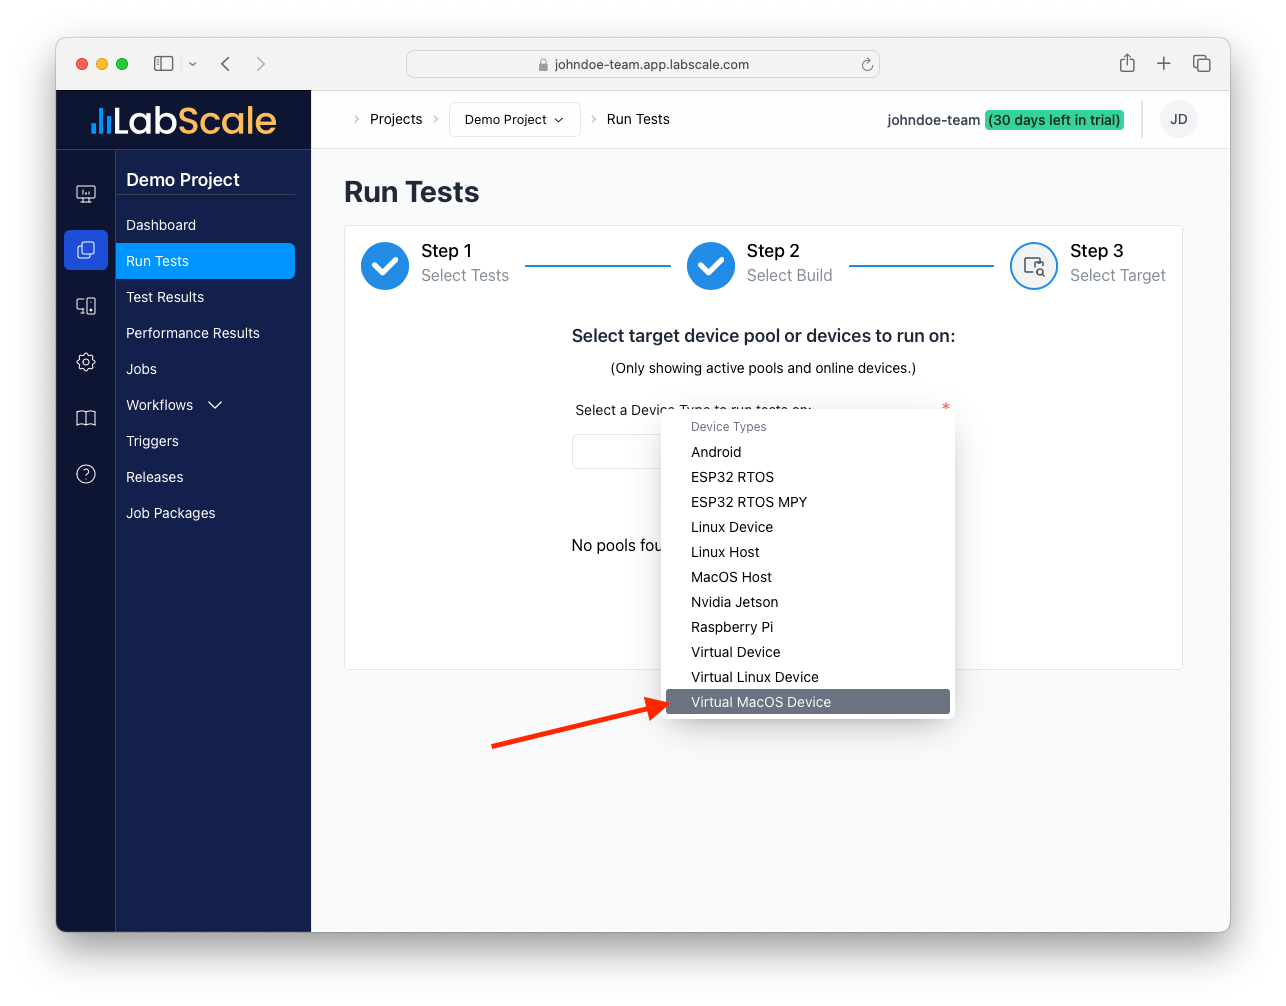
Click on Select a Device Type and select Virtual Device.
-
Click on Devices and select your Device created in the previous steps.
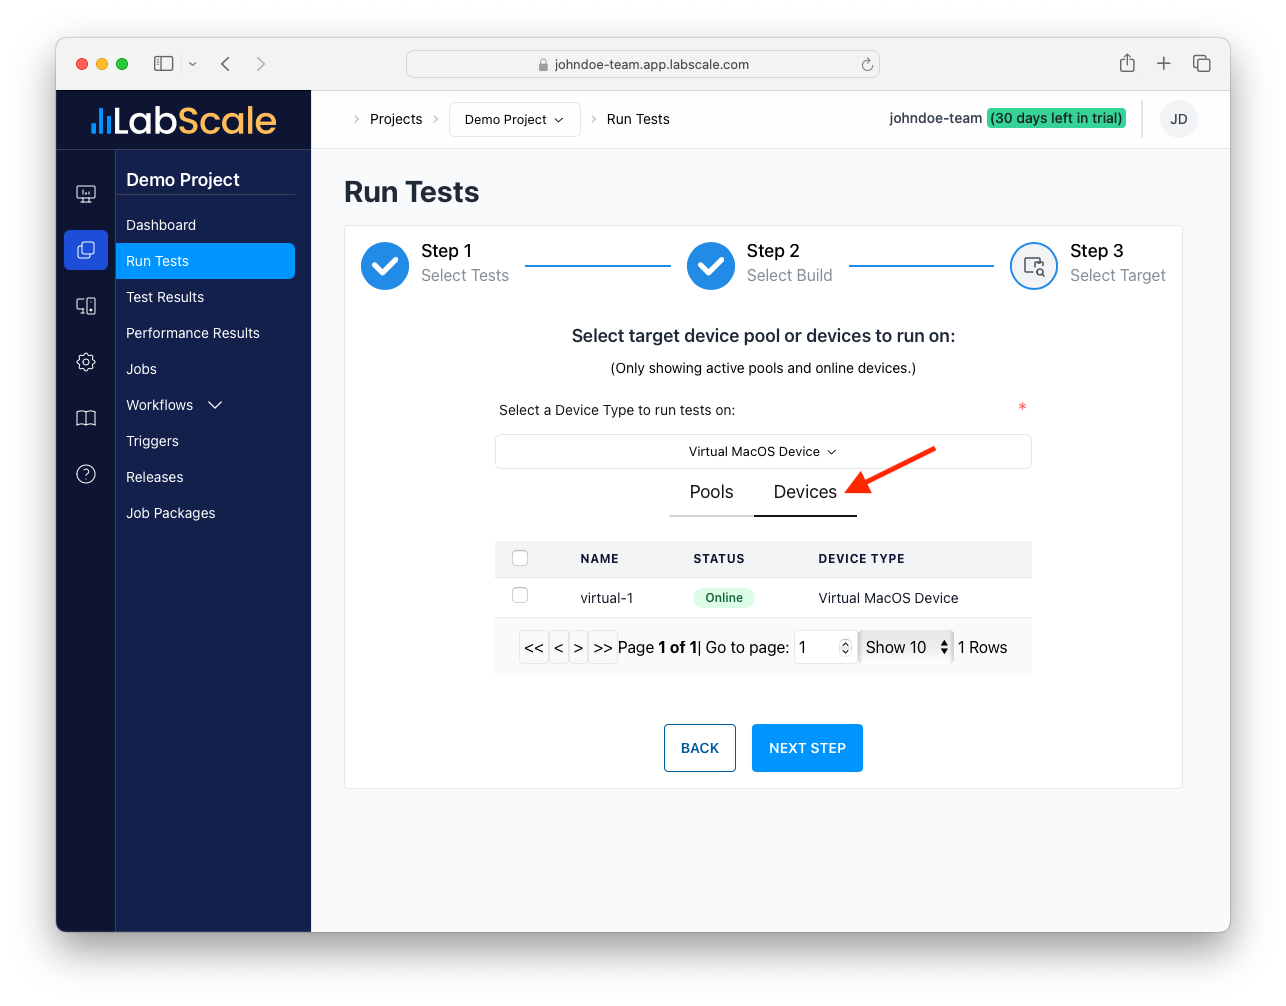
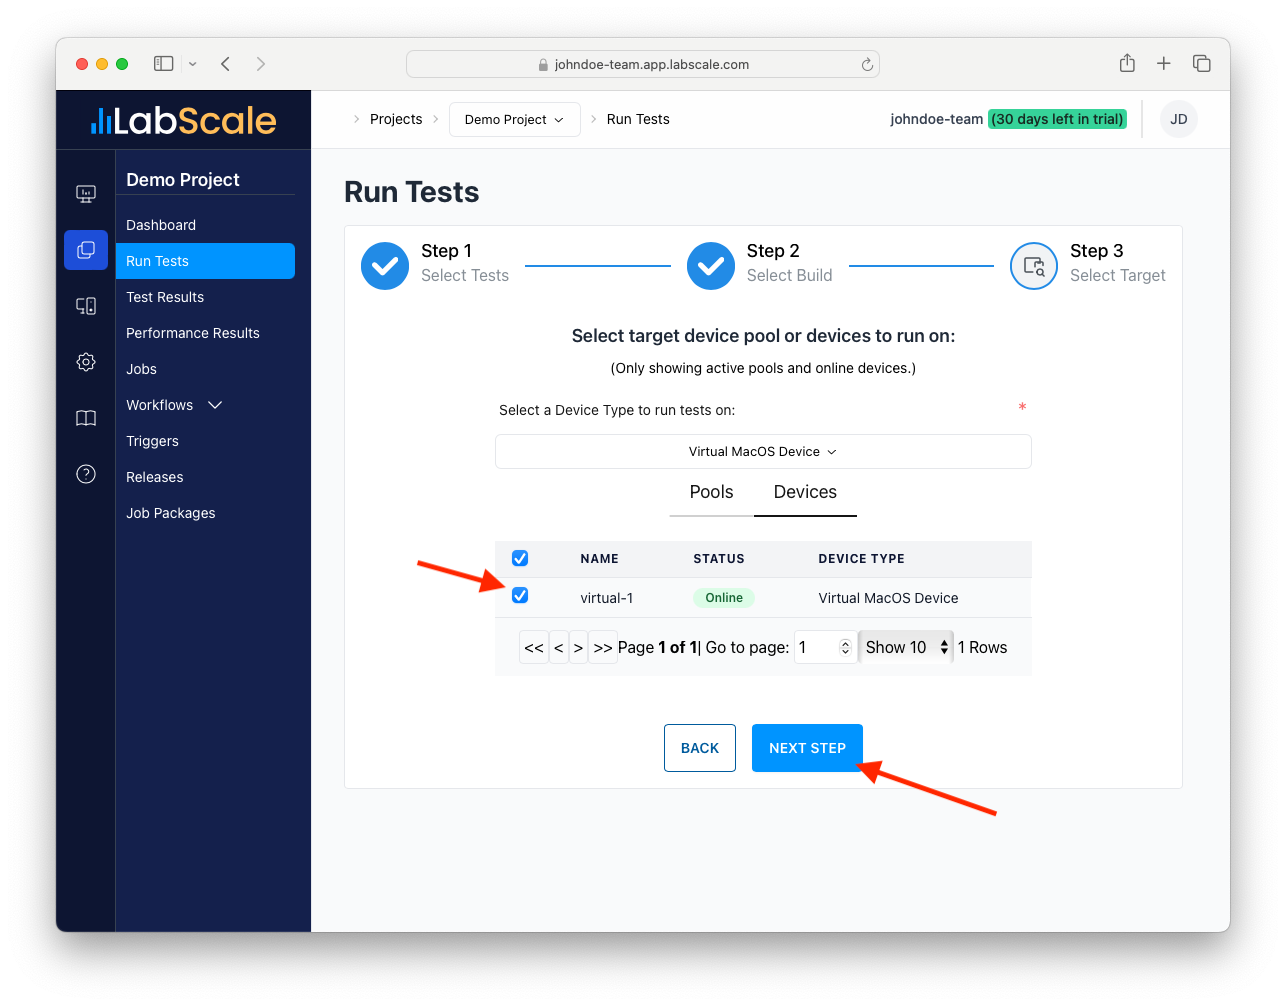
-
Click on NEXT STEP.
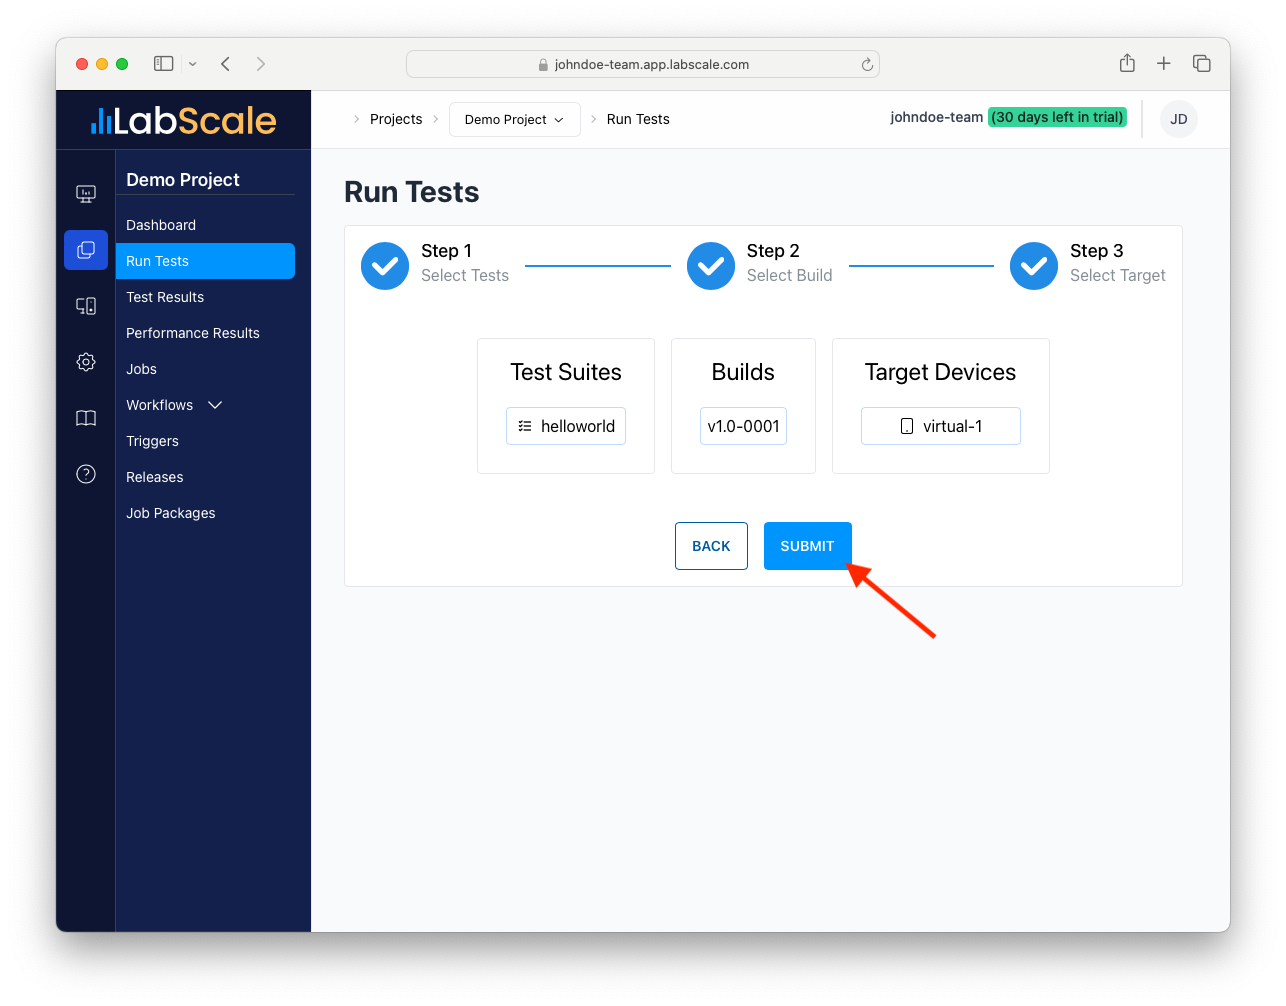
-
Click Submit.

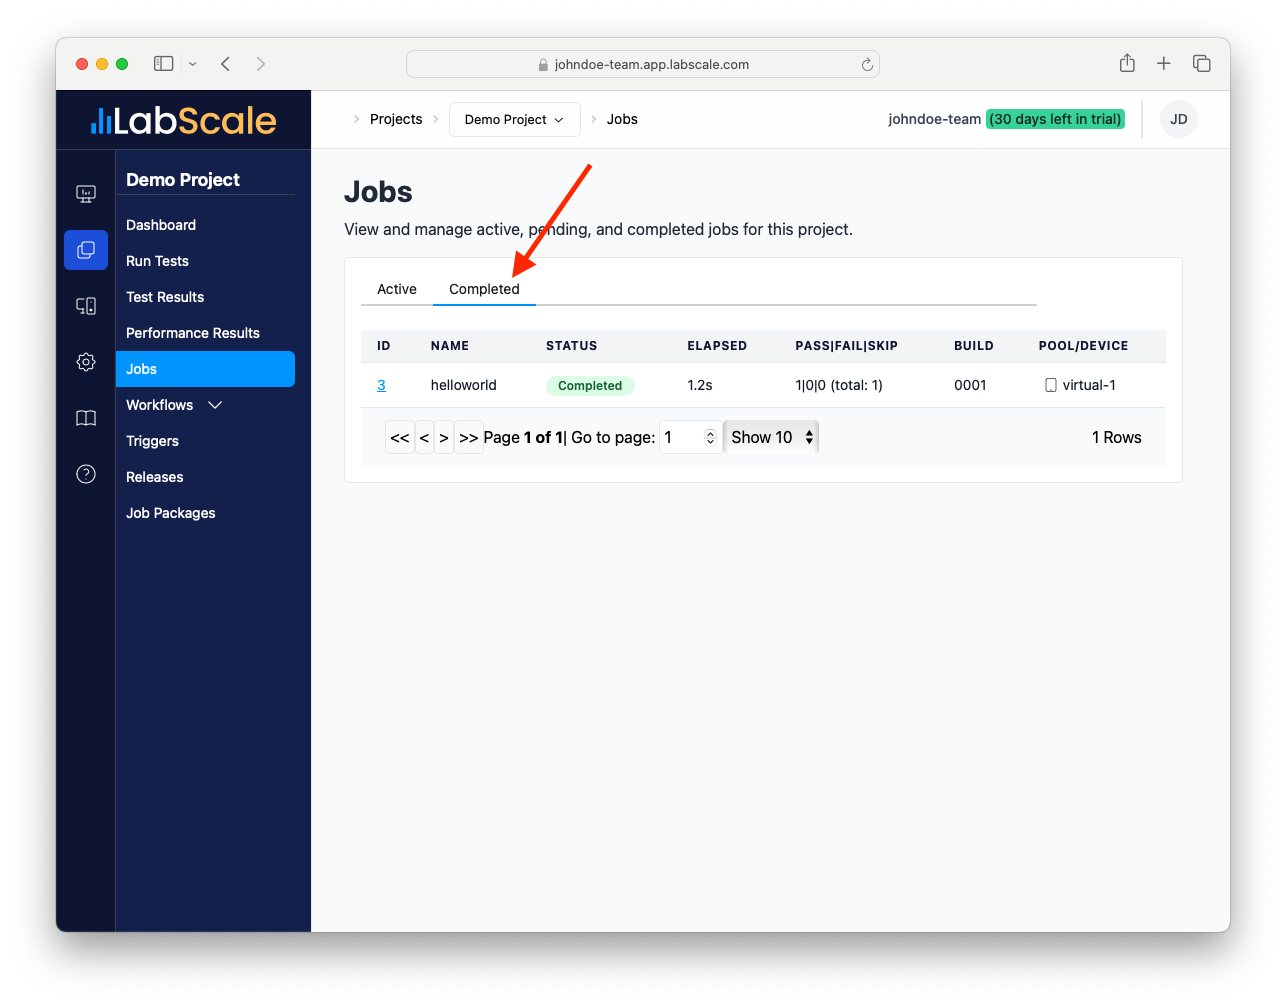
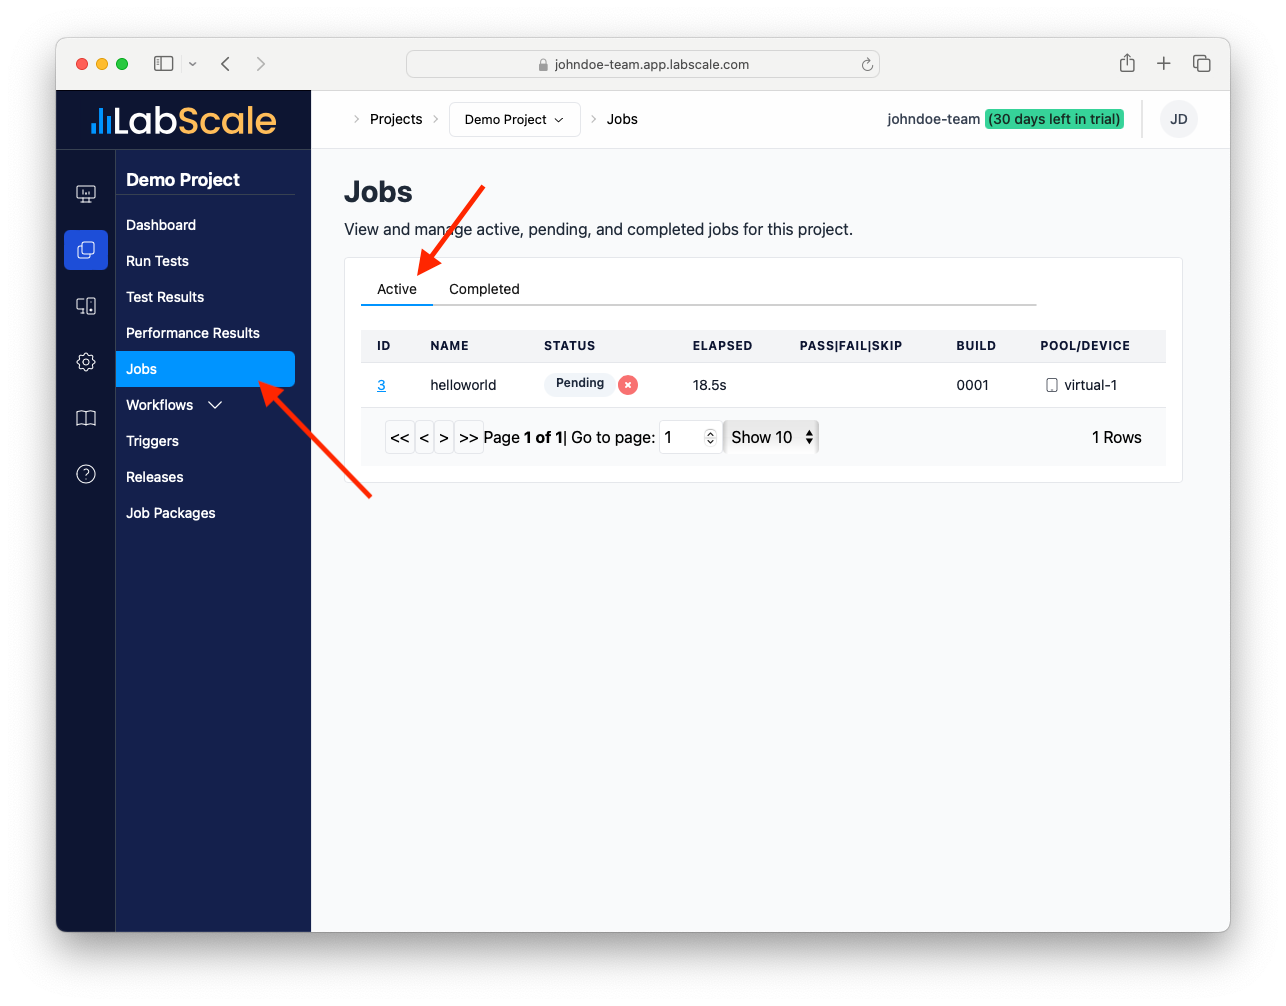
Viewing Test Results
The job to run the test is now queued and waiting in a pending state. It will be assigned to your device as soon as it calls in with a status update.
-
Select the Jobs menu in the navbar on the left side of the page. The test will be in one of three states, pending, running, or completed. The job will be in pending state for a short time before being accepted by the agent, therefore check the pending state tab at the top of the table.
-
The job will eventually be picked up by the agent and executed. The job will transition to a running state, and finally the completed state.